Short answer
Dig a pit about half a metre by half a metre in sandy or gravelly ground where you have the landowner's permission. Line the bottom with dry stones from land, not from water, and keep a fire going on them for about two hours. Remove most of the embers, then add a damp protective layer, the wrapped food, another protective layer and finally earth. Potatoes take about an hour and a half, and a whole chicken two and a half to three hours.
The spade cuts through the turf, and the sods are laid neatly to one side, grass up. Underneath there's sand. Half an hour later there's a ring of fist-sized stones at the bottom and a stack of dry wood on top. The fire burns all morning. At lunchtime the embers are shovelled aside, a pot is lowered in among the hot stones, earth goes on top and everyone walks away. Three hours later someone scrapes the lid clear, and up comes the steam from root vegetables and meat that has fallen apart all by itself.
The cooking pit is the slowest way to cook over a fire, and the laziest once it's going. Nobody has to stand there turning anything. But it takes more preparation than any other fire cooking, and two things need to be sorted before you even get the spade out.
The memory model: two questions before the spade, five layers in the pit
Two questions before the spade
- Am I allowed to dig here? The ground, the landowner, fire bans and ancient remains.
- Will the stones hold? Dry stones from land, without cracks or layers.
Five layers in the pit, from the bottom up:
- Hot stones with a few embers left.
- Damp protection, for example wet cloth, cabbage leaves or a thin layer of damp sand.
- The food, wrapped or in a pot with a lid.
- Damp protection again.
- Earth, thick enough that no steam can be seen escaping.
If the answer to both questions is yes and the layers are in the right order, the pit does the rest. More ways to cook in and under the embers are gathered on our page about cooking in a pit.
Question 1: Am I allowed to dig here?
The ground and the landowner
Allemansrätten, the Swedish right of public access, doesn't give you an automatic right to light a fire, and digging up the ground isn't part of it at all. Naturvårdsverket (the Swedish Environmental Protection Agency) also says the fire must not damage the ground. A cooking pit is a half-metre hole with a fire in it for several hours, which is something quite different from a small fire on a patch of gravel. That's why you need the landowner's permission:
- On your own land you decide for yourself, as long as there's no fire ban and the local council doesn't have its own rules on fires in gardens. The protection of ancient monuments still applies, see below.
- On someone else's land ask the landowner first. Say it's a cooking pit and that you'll put the turf back afterwards.
- In nature reserves, national parks and areas with ancient monuments special rules apply, which are posted on the noticeboards in the area or available from the länsstyrelsen (county administrative board). Assume it isn't possible.
- During a fire ban there's no cooking pit, because the fire burns for several hours. How the bans work is covered in the guide to fire in nature, rules and responsibility.
The right kind of ground
Both MCF (the Swedish Civil Defence Agency) and Naturvårdsverket warn against lighting fires on peatland, on moss and on humus-rich or earthy forest ground. There the embers can work their way deep into the ground, smoulder for a long time and flare up much later. For a cooking pit, where the fire sits down in the earth, that's especially important.
- Sand and gravel is best. Dig a test hole with the trowel. If you hit pale sand or gravel under the turf, the spot is good.
- Black, fibrous soil that carries on downwards means humus or peat. Choose another spot.
- Roots in the pit mean a tree is too close. Roots can keep smouldering underground.
- Not near stumps and anthills, both of which are hard to put out if they catch fire.
Old pits and stones
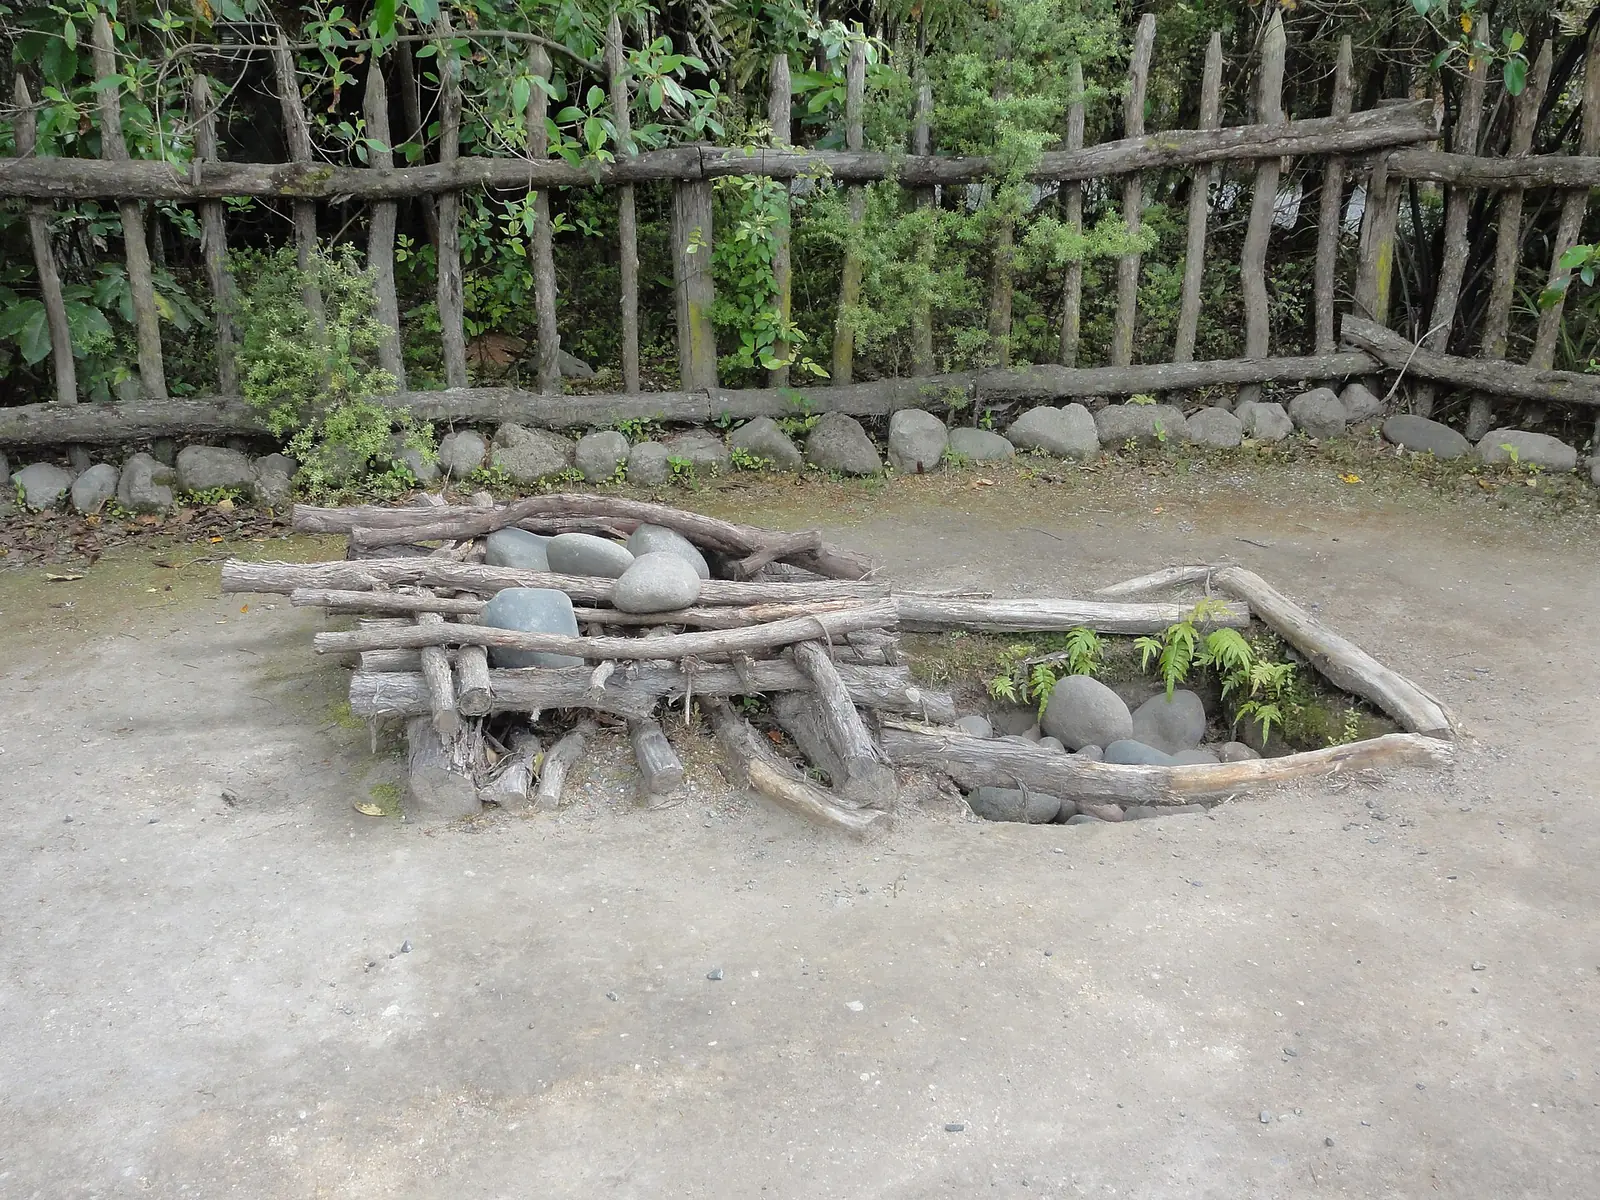
Archaeologists call exactly this a cooking pit: a pit where hot stones were laid, the food went on top and everything was covered with earth and turf. Pits and hearths like these from prehistoric times survive all over Sweden, and they can be ancient monuments.
Under the Swedish Historic Environment Act, you need the länsstyrelsen's permission to move, dig out, cover or damage an ancient monument, and an area around it is protected too. That also applies to remains nobody knows about yet, and it applies on your own land as well. In practice:
- Never dig in an old pit or a hollow with sooty soil, charcoal and stones that are grey or reddish, crazed and crumbly. This is called fire-cracked stone and is a sign of very old fires.
- Don't take stones from stone settings, cairns or stone walls. They can be ancient remains, and they belong to the landowner.
- Check Fornsök, the Swedish National Heritage Board's (Riksantikvarieämbetet) map of known remains, if you're going to dig somewhere new. If you find something that looks old, leave it where it is and contact the länsstyrelsen.
More on why cooking pits, kolbullar and boiled coffee belong to the Swedish forest is in the guide to swedish outdoor food and history.
Question 2: Will the stones hold?
Stones that heat up quickly can crack with a bang and send sharp fragments flying sideways. The most common reason is water. Moisture inside the stone turns to steam that can't get out, and the stone bursts from the inside. How a particular stone behaves also depends on cracks, pores and how fast it heats up, so no stone is completely safe. Keep your distance while they heat up.
Stones to avoid
- Stones from water, meaning from the edge of a lake, a stream, the beach or a wet ditch. Even a hard stone can have water in tiny cracks.
- Sandstone and limestone, which are porous and soak up moisture.
- Slate and other stones that are visibly made up of thin layers.
- Flint, which splinters easily and sharply.
- Stones with visible cracks or that have already been in a fire and are crumbly.
- Bedrock and fixed boulders. Never light a fire on them, and never break stone off rock.
Stones that usually hold
Dry, whole, dense stones that have been lying on land, ideally on a gravelly slope or at the edge of a field where the landowner has said yes. Granite and gneiss are common rocks in Sweden and usually work better than porous stones, but even they can crack if there's water in tiny cracks. They should be roughly the size of one to two fists. Smaller stones don't hold the heat, and larger ones take too long to heat up.
Naturvårdsverket says you need the landowner's permission to collect stones, but that the odd loose stone can be acceptable. A cooking pit needs 15–25 stones, so ask. If you have stones in your garden at home that have been lying dry for a long time, bring them.
Two simple tests
- The sound test. Tap two stones lightly against each other. A clear, hard ring suggests a whole stone. A dull, rattling or crumbly sound suggests cracks or a porous stone.
- The first round. Put the stones at the edge of a small fire first, so they heat up slowly and have time to dry. Step away while that happens. If one goes bang, remove it once it has cooled.
Three ways to wrap the food
The food must never lie directly against earth or ash. There are three common ways to protect it.
| Method | Suited to | Pros | Cons |
|---|---|---|---|
| Pot with a tight-fitting lid | Stews, beans, kalops, whole chicken, root vegetables | No earth gets in, copes with acidic food and can be opened and checked | Needs a cast-iron pot with no plastic parts |
| Double foil and wet cloth | Whole chicken, pieces of meat, potatoes, fish | Flexible and easy to carry | The foil can split against the stones, and acidic food shouldn't lie directly against the foil |
| Cabbage leaves and wet cloth | Fish, root vegetables, sausage | The oldest way, with no metal | Harder to make tight, and takes more experience |
A pot is best the first time. It can lie in the pit for hours, and you can lift the lid and take the temperature without the parcel falling apart. How the cast-iron pot works in embers, and why plastic knobs don't belong there, is covered in the guide to cast-iron pot over a fire.
Foil should be heavy-duty or doubled, with the seam folded over several times. The folding is explained step by step in the guide to foil parcels in the embers. Then wrap a wet cotton or jute cloth around the parcel. The cloth holds the moisture and protects the foil from the stones. Never use synthetic fabric or plastic, as it melts.
Leaves. Cabbage leaves, ideally several layers, protect fish and vegetables well. Don't take green twigs and leaves from living trees and bushes, as allemansrätten doesn't allow it. Bring what you need from home.
Building the pit step by step
The size of the pit
For a family, a pit of about 50 × 50 centimetres and 40–50 centimetres deep is enough. If a pot is going in, make the pit big enough to leave a hand's width around the pot and deep enough for the lid to sit a little below ground level.
How to do it
- Mark out and lift the turf. Cut the turf into a few large pieces with the spade and lay them to one side, grass up, ideally in the shade. Water them if it's warm.
- Dig the pit and put the earth in a pile next to it, close enough to shovel back.
- Line the bottom with stones in one layer, and put a few along the sides.
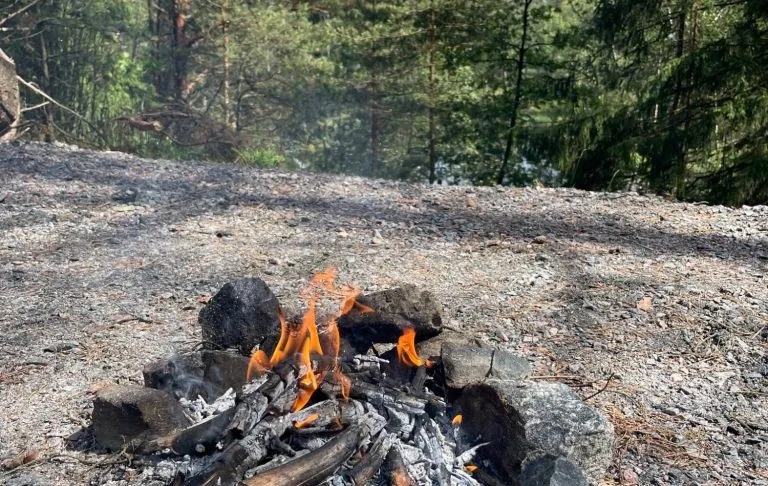
- Build a fire in the pit with kindling at the bottom and dry wood on top. How to get it going on the first try is covered in the guide to lighting a fire step by step. You can also put more stones on top of the wood, so they heat up from all sides.
- Keep the fire going for about two hours. Keep adding wood the whole time. The stones are ready when drops of water sizzle away in a second and the stones look greyish white with ash.
- Remove the embers. Shovel out most of the embers and ash with the spade and put them in a pile next to the pit, or in a metal bucket. A few embers between the stones don't matter.
- Add the damp protection. Wet cloth, cabbage leaves or a few centimetres of damp sand over the stones.
- Put the food in quickly, with whatever takes longest at the bottom.
- Add the next damp layer over the food. You can also put a few hot stones around it, or embers on the pot lid.
- Shovel the earth back in until no steam can be seen. If you see steam pushing up anywhere, add more earth there.
- Mark out the pit with sticks all around, so nobody steps in it.
An example timetable
| Time | What happens |
|---|---|
| 10.00 | The pit is dug and the stones go in |
| 10.30 | The fire is lit, and wood is added the whole time |
| 12.30 | The stones are hot. The embers are removed and the food goes in |
| 12.45 | The pit is covered. Free time for two to three hours |
| 14.15 | Potatoes and root vegetables may be ready |
| 15.15–15.45 | Whole chicken or stew is dug up and the temperature checked |
Timings and when it's done
The times apply to a pit where the stones have been heated for about two hours, with the food wrapped or in a pot. A small pit, cool weather or stones that didn't get properly hot make everything slower. Treat the times as a guide.
| Ingredient | Approximate time | How to tell it's done |
|---|---|---|
| Potatoes, medium-sized and whole | 1–1.5 hours | A roasting stick slides straight in |
| Carrot, parsnip, beetroot in large pieces | 1–1.5 hours | Soft all the way through |
| Corn on the cob | 45–60 minutes | The kernels are glossy and burst when you press them |
| Whole fish or a large piece of fish | 45–75 minutes | The flesh comes away from the bone and flakes |
| Chicken thighs and drumsticks | 1.5–2 hours | At least 70 degrees by the bone |
| Whole chicken, 1.2–1.5 kg | 2.5–3 hours | At least 70 degrees between the thigh and the breast |
| Stew with stewing beef | 3–4 hours | The meat falls apart under the fork |
| A whole piece of pork or chuck, around 1.5 kg | 4–5 hours | Tender and pulls apart |
| Beans and sausage in a pot | 2–3 hours | Bubbling when the lid is lifted |
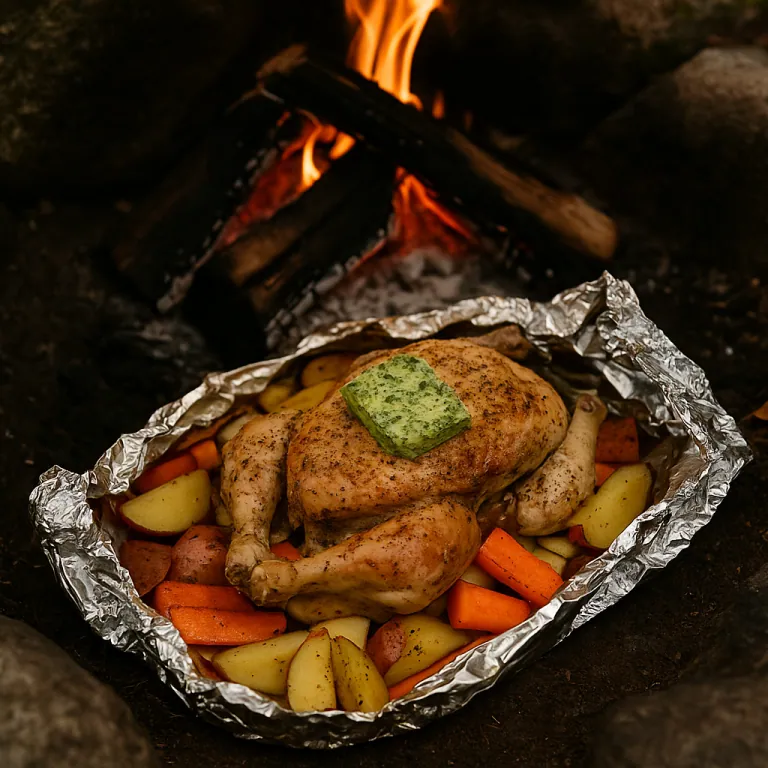
Whole chicken in the pit has its own recipe: whole chicken in a cooking pit with root vegetables. Whole potatoes in ordinary embers are covered in the recipe for baked potatoes in the embers, and they're the best thing to start with, because they show how hot the pit got. Stews that benefit from long heat include kalops and beans and sausage, which you first bring to the boil over the fire and then bury.
Measure, don't guess
Dig it up, lift it out and open it on a stone or board, not down in the pit where earth trickles in. Chicken and mince should be checked with a thermometer in the thickest part. Livsmedelsverket says that chicken should always be cooked through, that mince is only cooked through at 70 degrees and that colour isn't enough to tell. Aim for at least 70 degrees for chicken too, and clear juices with no trace of pink.
If the pit has cooled too soon
If the food isn't done when you dig it up and the stones are only lukewarm, don't bury it again. Food left lukewarm for hours is exactly what you want to avoid. Finish cooking it straight away in the pot over the fire, and check the temperature again.
Troubleshooting: when it goes wrong
| What happens | Why | How to rescue it |
|---|---|---|
| The food is still raw after several hours | The stones didn't get hot enough, or the pit was too small | Finish it over the fire. Keep the fire going longer next time and use more stones |
| The bottom is burnt | Too little damp protection against the stones, or too many embers left | Scrape off the burnt bits. More wet cloth or sand next time |
| Earth in the food | The foil split on a sharp stone, or the parcel was opened in the pit | Rinse off what you can. A pot, or double foil and cloth, next time |
| Steam is coming out of the ground | The layer of earth is too thin and the steam is escaping | Add more earth where it's steaming |
| A stone went bang | Moisture in the stone, or an unsuitable type of rock | Let it cool and throw away the pieces. Ask for new stones from land |
| The meat is dry | Too long, or no damp layer | Serve with sauce or stock. Shorter time and wetter cloth next time |
At home or by the fire
- At home: cut the root vegetables, make herb butter and wrap the meat. Meat, chicken and fish stay in a cool box with ice packs right up until they go into the pit. Livsmedelsverket (the Swedish Food Agency) says chilled food shouldn't be left out for more than two hours.
- The pot: get it ready to cook at home, or bring it to the boil over the fire before you bury it. That way it starts hot and the pit only has to hold the heat.
- By the fire: dig and light the fire first of all. The fire takes two hours, and you have time for other things meanwhile.
- Hands: wash them after touching raw meat and chicken. How to do that outdoors without running water is covered in the guide to hygiene and washing up outdoors.
- Leftovers: into the fridge as soon as they've cooled.
A pit without a pit
Don't dig at a built fire pit or a gravel fireplace. Do this instead: let the fire burn down to a thick bed of embers, make a hollow in the embers, set a cast-iron pot with a lid in it and shovel embers and hot ash around it and over the lid. It gives the same slow heat, and you can top up with fresh embers from the fire next to it.
Afterwards: put it out and leave no trace
- Put out the stones. Pour water over the stones and the pile of embers, stir with the spade and pour again.
- Feel for heat. Hold your hand over the ash and dig underneath it, both at the bottom of the pit and at the edges, because embers can work their way down into the ground. It should be cold everywhere, and no smoke should be visible. More about putting the fire out properly is in the guide to fire safety in nature.
- Fill it in. Shovel the earth back and tread it down.
- Put the turf back grass up, and water it.
- The stones can be put back where they were, or kept for next time if it's your own land. Foil and cloth go home with you.
Done properly, you can barely tell there's been a pit there.
Safety: the stones, the spade and the steam
- Hot stones look cold. A stone that has been in the fire stays hot for hours, long after it has stopped glowing. Never touch the stones with your hands, not even when it seems like a long time has passed.
- Keep your distance while the stones heat up. Don't lean over the fire while the stones are getting hot, in case one cracks.
- Mark out the pit. A covered cooking pit is hard to see, and anyone who steps in it can get burnt through their shoe.
- Open it carefully. Lift the pot or parcel with gloves and tongs, and open the lid or foil away from your face. The steam burns.
- Only light a fire where it's allowed, and check whether there's a fire ban. What applies is covered in fire in nature, rules and responsibility.
If someone gets burnt, 1177 (the Swedish healthcare advice service) advises cooling it with cool water for about a quarter of an hour, no longer, and never with ice or snow. Seek medical care immediately if the burn is on the face, hands or feet or over a large joint, if there are blisters over an area larger than the injured person's own hand, or if the child is one year old or younger.
The children's role
A cooking pit is a half-day project that children often find exciting, because the food disappears into the ground and comes back up again. The ages are a rough guide. Go by what your child is used to.
- The youngest can look for stones with a grown-up, do the sound test and carry cold stones to the pit. They can also scrub the root vegetables and lay them on the cloth.
- Slightly older children, often from six or seven, can dig with their own spade, lift the turf and lay the stones in the bottom before the fire is lit. They can also keep an eye on the clock and say when it's time.
- Older children who are used to fire can look after the fire during the two hours and add wood, with a grown-up close by.
When the stones are hot, when the embers are shovelled aside and when the pit is opened, the children stand a couple of metres away. That's where the grown-ups do the work. More roles at the fire are in the guide to cooking with children over a fire, and what's good to bring is in the guide to equipment for fire cooking.
The cooking pit in brief
Two questions before the spade: am I allowed to dig here, and will the stones hold? Then five layers: hot stones, damp protection, the food, damp protection and earth. Keep the fire going for two hours, leave the food in for two to five, check the chicken's temperature and put the turf back. That's all it takes to get a dinner out of the ground.
What you need at the cooking pit
Frequently asked questions
Are you allowed to dig a cooking pit in the forest under the right of public access?
No, not without the landowner's permission. Allemansrätten doesn't give you an automatic right to light a fire, and digging in the ground isn't part of it. Dig on your own garden or land, or ask the landowner first. In nature reserves, national parks and areas with ancient monuments special rules apply, and during a fire ban there's no cooking pit at all.
Which stones crack in a fire?
Stones that contain water or are porous. That means above all stones from lakes, streams and beaches, but also sandstone, limestone, slate and flint, and stones that already have cracks or are visibly made up of layers. Choose dry, whole stones that have been lying on land, such as granite or gneiss, and heat them gently the first time. No stone is completely safe, so keep your distance while they heat up.
How long should the food stay in the cooking pit?
Allow about one to one and a half hours for potatoes and root vegetables, two and a half to three hours for a whole chicken and three to five hours for a stew or a large piece of meat. The time depends on how hot the stones got, how big the pit is and how cold it is outside. Always check chicken and mince with a thermometer.
How do you know the chicken in the pit is cooked through?
Use a meat thermometer in the thickest part, between the thigh and the breast. Livsmedelsverket says that chicken should always be cooked through, that mince is only cooked through at 70 degrees and that colour isn't enough to tell. Aim for at least 70 degrees for chicken too. If it isn't there yet, finish it in a pot over the fire rather than burying it again in a pit that has already cooled.
Can the food lie directly against the earth?
No. The food should be wrapped so tightly that no earth, ash or sand can get to it. The easiest option is a cast-iron pot with a tight-fitting lid. Otherwise, two layers of heavy-duty foil with wet cloth around them. Between the stones and the food there should also be a damp protective layer, so the bottom doesn't burn.
Can you cook in a pit at an ordinary fire pit?
Don't dig at a built fire pit. Make a pit without a pit instead: let the fire burn down, bury a cast-iron pot with a lid in the bed of embers and shovel embers and hot ash around and over it. It gives the same slow heat without disturbing the ground.
How do you put out a cooking pit?
Pour water over the hot stones and the embers once the food is out, stir with the spade and pour on more water. Hold your hand over the ash and dig underneath it, right down to the bottom and at the edges. Only when everything is cold and no smoke can be seen do you fill in the pit and put the turf back.